
To export data from Triple Whale to Snowflake, you must set up a Snowflake service user, role, schema, and grant the necessary permissions. This guide walks you through the setup process to ensure a seamless connection.
Authenticate using PAT (Programmatic Access Token)
Triple Whale also supports connecting to Snowflake using a Programmatic Access Token (PAT) instead of a username and password.
If your organization prefers or requires token-based authentication, follow the steps here to generate a PAT and learn how to use it when connecting Triple Whale to Snowflake.
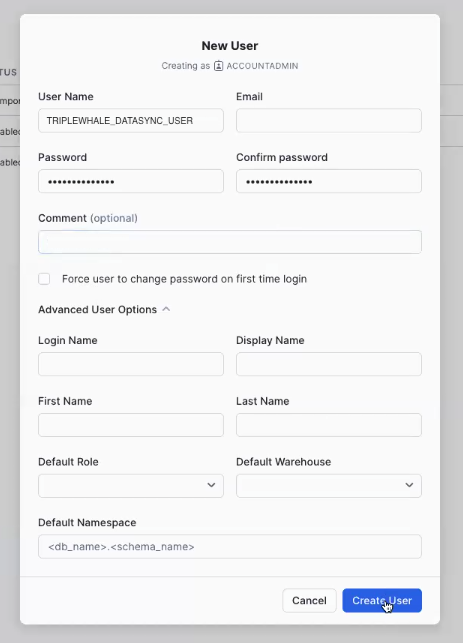
Step 1: Create a Triple Whale Service User
Create a dedicated Snowflake service user for Triple Whale's data export process.
- Navigate to Admin > Users & Roles > Users.
- Click the + User button.
- Give the User a User Name and Password, uncheck Force user to change password on first time login (to avoid login issues), and click Create User.
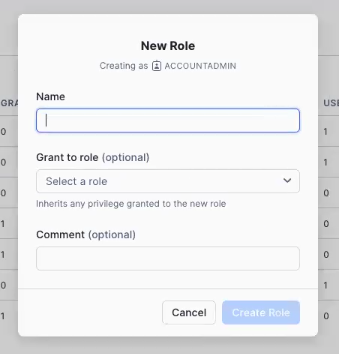
Step 2: Create a New Role
A role is required to manage access to the warehouse, database, and schema.
-
Navigate to Admin > Users & Roles > Roles.
-
Click the + Role button.
-
Give the role a Name and click Create Role (privileges will be added later, in Step 4).
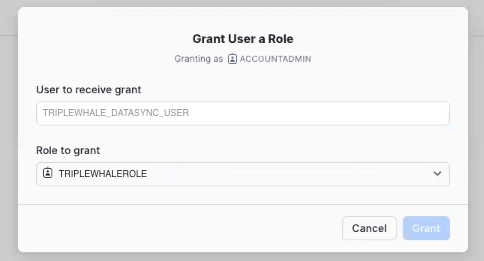
Step 3: Assign the Service User to the Role
-
Navigate to Admin > Users & Roles > Users.
-
Select the newly created service user.
-
Click Grant Role and assign the new role to the user.
Step 4: Grant Database and Schema Privileges to the Role
Select or Create a Database and Grant Privilege
- Navigate to Admin > Warehouses.
- Either create a new database or select an existing one, where you will send your Triple Whale data.
- Click the + Privilege button, select the new role (from Step 2), and grant the USAGE privilege.
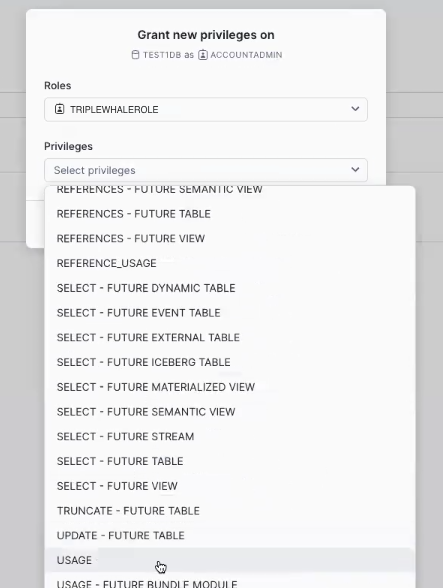
Create a Schema and Grant Privileges
-
Navigate to the database where you will send your Triple Whale data - Admin > Data > Databases > (Selected Database).
-
Click the + Schema button to create a new schema, where you will send your Triple Whale data.
-
Navigate to the newly created schema where you will send your Triple Whale data - Admin > Data > Databases > (Selected Database) > (Selected Schema).
-
Click the + Privilege button in the schema settings, select the new role, and grant the following privileges:
- CREATE TABLE
- CREATE VIEW
- INSERT - FUTURE TABLE
- SELECT - FUTURE TABLE
- UPDATE - FUTURE TABLE
- USAGE
Connecting to Triple Whale
Once the Snowflake setup is complete, connect it to Triple Whale so it can be used as a Data Warehouse Export destination.
-
Go to the Data Warehouse Export page.
-
Click Connect on the Snowflake integration.
-
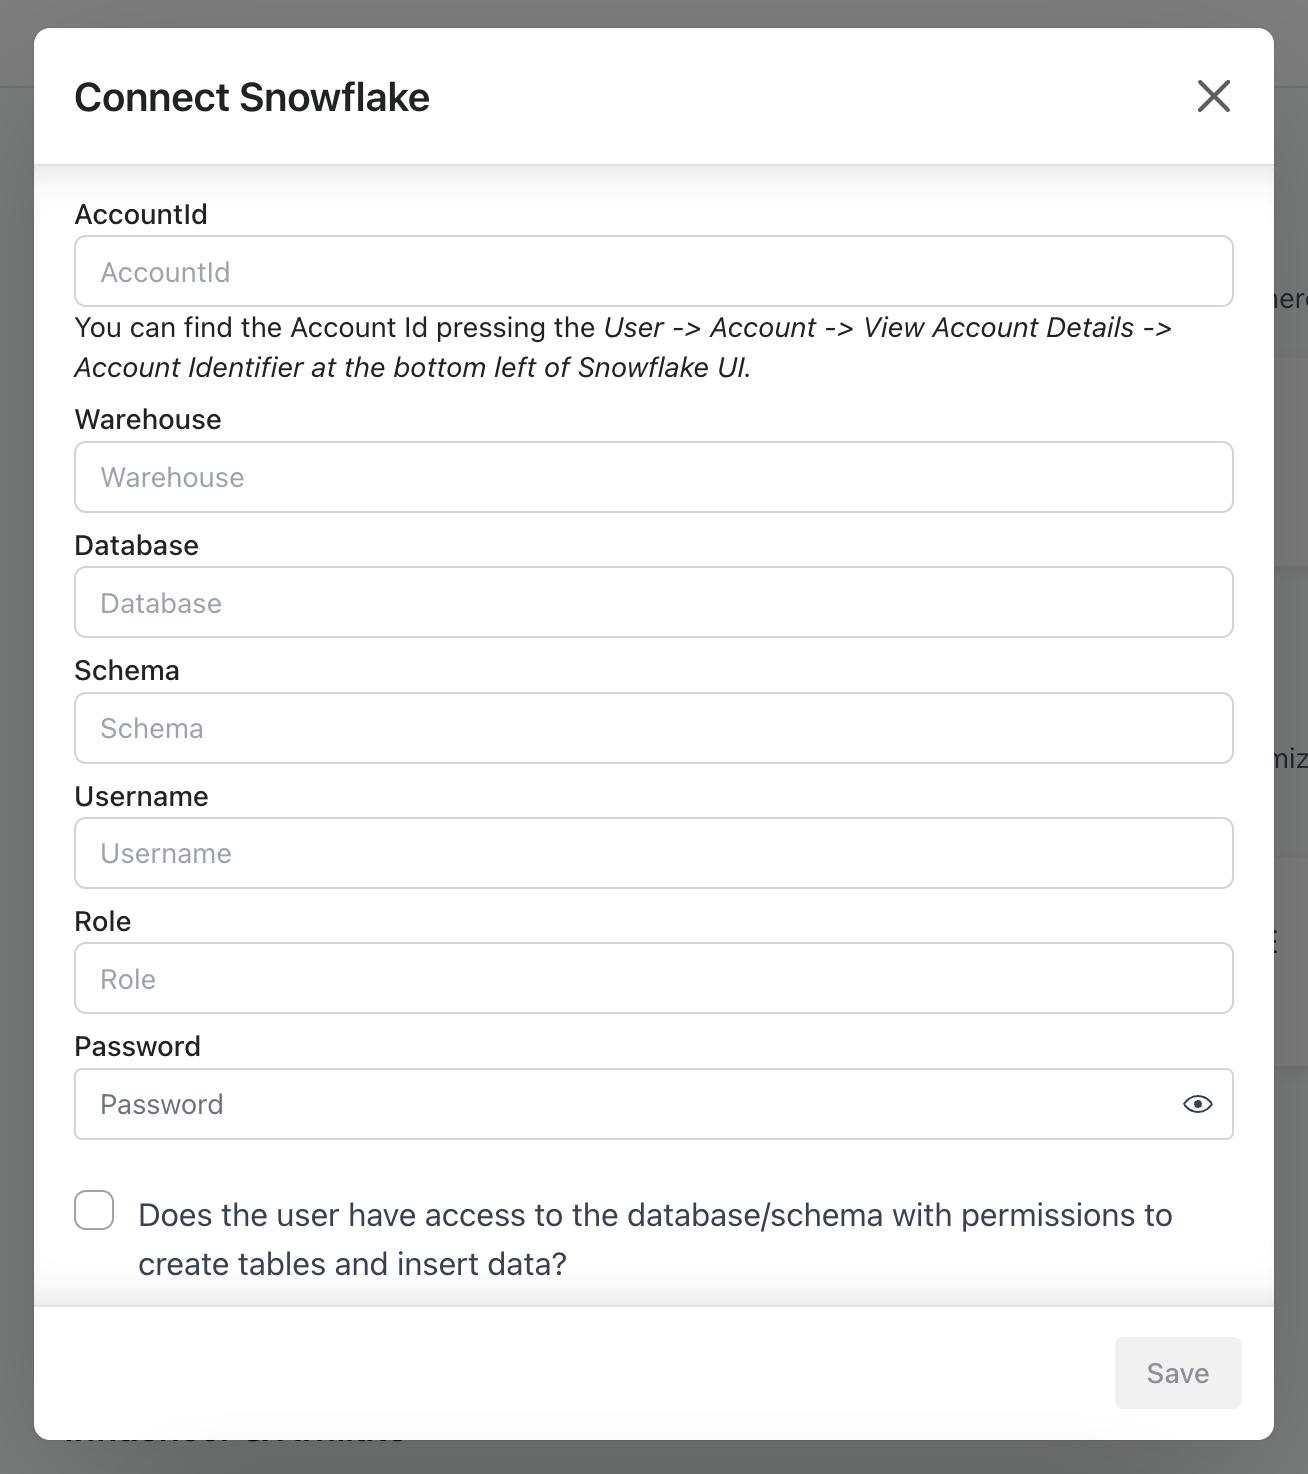
Enter the required details in the Triple Whale connection popup
- To view the AccountId, Warehouse, Database, and Schema details in Snowflake:
- Navigate to Admin > User menu (bottom left) > Account > View Account Details > Config File.
- From the dropdown menus, select the Warehouse, Database, and Schema where you will send your Triple Whale data.
- The config file now displays the following information:
account--> AccountIdwarehouse--> Warehousedatabase--> Databaseschema--> Schema
-
Check the checkbox confirming that you have granted all the necessary privileges to your service user.
-
Enter the Username and Password you created in Step 1, and the Role you created in Step 2.
-
Click Save to complete the setup.
Connecting Snowflake to Triple Whale
Creating a Data Warehouse Export
After connecting your Snowflake warehouse to Triple Whale, you can export data using the Data Warehouse Export feature.
-
Go to the Data Warehouse Export page.
-
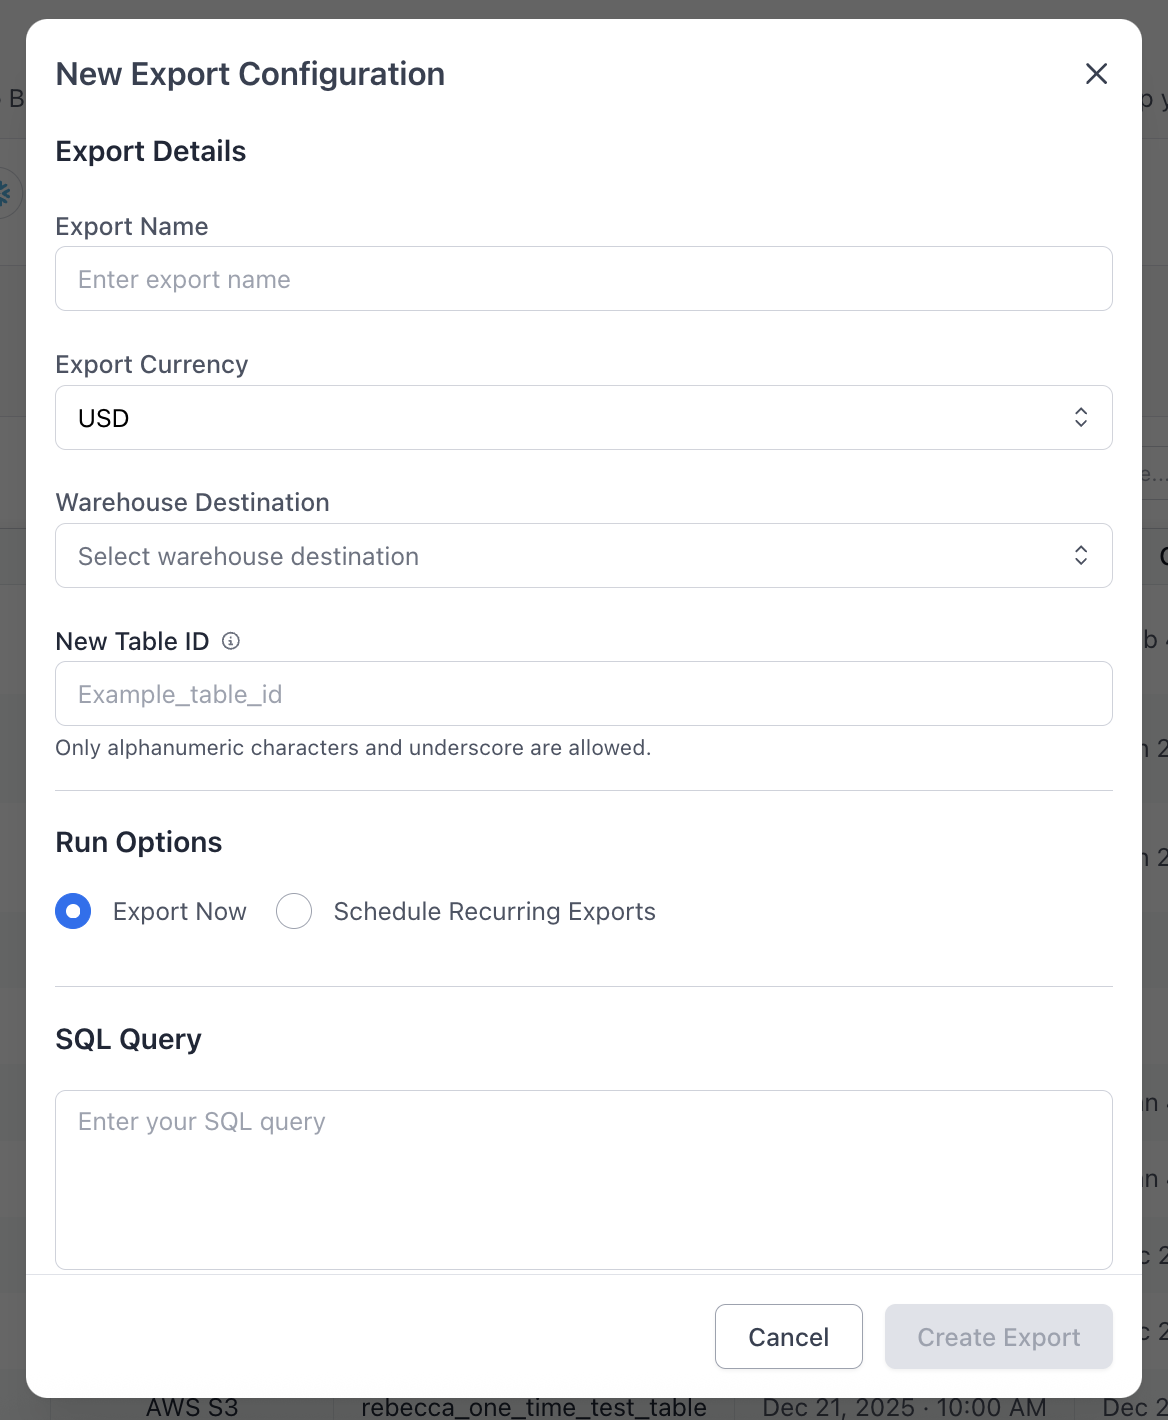
Click New Export, then select your connected Snowflake destination and specify a New Table ID. The new table will be created automatically in your selected schema.
-
Define the SQL Query whose results should be exported to Snowflake.
Select Specific ColumnsAvoid using
SELECT *. Triple Whale’s schema is dynamic, and wildcard selection can lead to broken or inconsistent results as fields change. Always specify the exact columns you need. -
Choose How the Export Runs – You can either:
- Export Now to run a one-time export, or
- Schedule Recurring Exports (for example, hourly or daily) to configure automated recurring exports.
-
Create Export – Once saved, the export will either run immediately or on its configured schedule and append new rows to the destination table.
Handling Data De-duplication (Recommended)
Now that your Snowflake database is connected to Triple Whale, it's important to handle duplicate records to ensure accurate data in your warehouse. Since each export appends new rows rather than updating existing ones, querying the raw data directly may result in inflated totals if duplicates aren’t managed.
Because unique row keys depend on the structure of your query, Triple Whale does not automatically de-duplicate records. You must define the right approach based on your data model.
To prevent duplication-related issues, follow the best practices outlined in the De-duplication for Data Warehouse Export guide:
- Tracking the most recent version of each record
- Identifying unique row keys based on your data model
- Filtering out older duplicate rows in your queries
Implementing de-duplication ensures that your analysis reflects the most accurate and up-to-date data in your warehouse.
Troubleshooting
Common Errors and Fixes
- "Access Denied": Ensure that the user has been assigned the correct role and the role has been granted necessary permissions on the database and schema.
- "Database Not Found": Verify that the database name entered in Triple Whale matches the one in Snowflake.
- "Schema Not Found": Confirm that the schema exists and that the name entered in Triple Whale matches the one in Snowflake.